How to Create a Christ-Centered Christmas for Your Kids
3 years ago before this on-line ministry was born, it was during the Thanksgiving weekend when my husband made a suggestion to me about writing a book with all the Christ-centered Christmas activities I did with my kids. He felt it would be a great resource for me to give to all of the families in the homeschool group that we ran at the time.
Hmmm, I thought, I could do that because it’s almost like writing a bunch of recipes, only instead, it’s a bunch of activities.
So I started the project and I had to finish it fast since it was filled with time-sensitive Christmas related activities, and well, it was Thanksgiving weekend! So, 8 days later I finished the book. And now I’ve changed the book just a bit seeing how it’s not just for the homeschooling mom, but for any mama who has the desire to point her kiddos to Christ during the Christmas season. (The book was formerly titled: How to Strengthen Your Child’s Faith at Christmas.)
And being that I’m now getting questions from wives about what they should do with their Christmas traditions and celebrations when their views differ from their husbands, I believe what I cover in this book will help the two of you come to an agreeable resolution for the whole family.
Christmastime is not always an easy time for the mama. We put so much pressure on ourselves to have the perfect Christmas for our family but perfection is unattainable, therefore we’re either left feeling defeated, irritated, or exhausted during this unrealistic pursuit. I know, I’ve been there!
I wrote this book based out of many of those emotions, as well as being a chronically-ill mom who struggled to get through my days. Since my body had a limited amount of physical energy, I felt it was imperative to choose activities that were going to draw my children closer to Jesus. I was redeeming my time, so to speak!
I also address in the book what to do with Jesus and Santa, and how do I, as a wife and mom, now make traditions for my own family rather than just carry on traditions from mine and my husband’s upbringing. Yes, I did tackle the great Santa debate in this book. Not because I wanted to be divisive, but rather because my Lord abruptly woke me up out of a dead sleep around 4:00 a.m. and told me to write about Him. I personally wanted to leave the whole Santa section out of the book, but my Savior had other plans….and I wanted to obey Him.
I also address what Advent is and how to keep it simple for your kids. And I share many more hands-on activities to help your child focus on Christ.
How to Create a Christ-Centered Christmas for Your Kids is available on Kindle. (If you don’t have a Kindle, you can still download the book onto your computer.) Click here for more info. about the book.
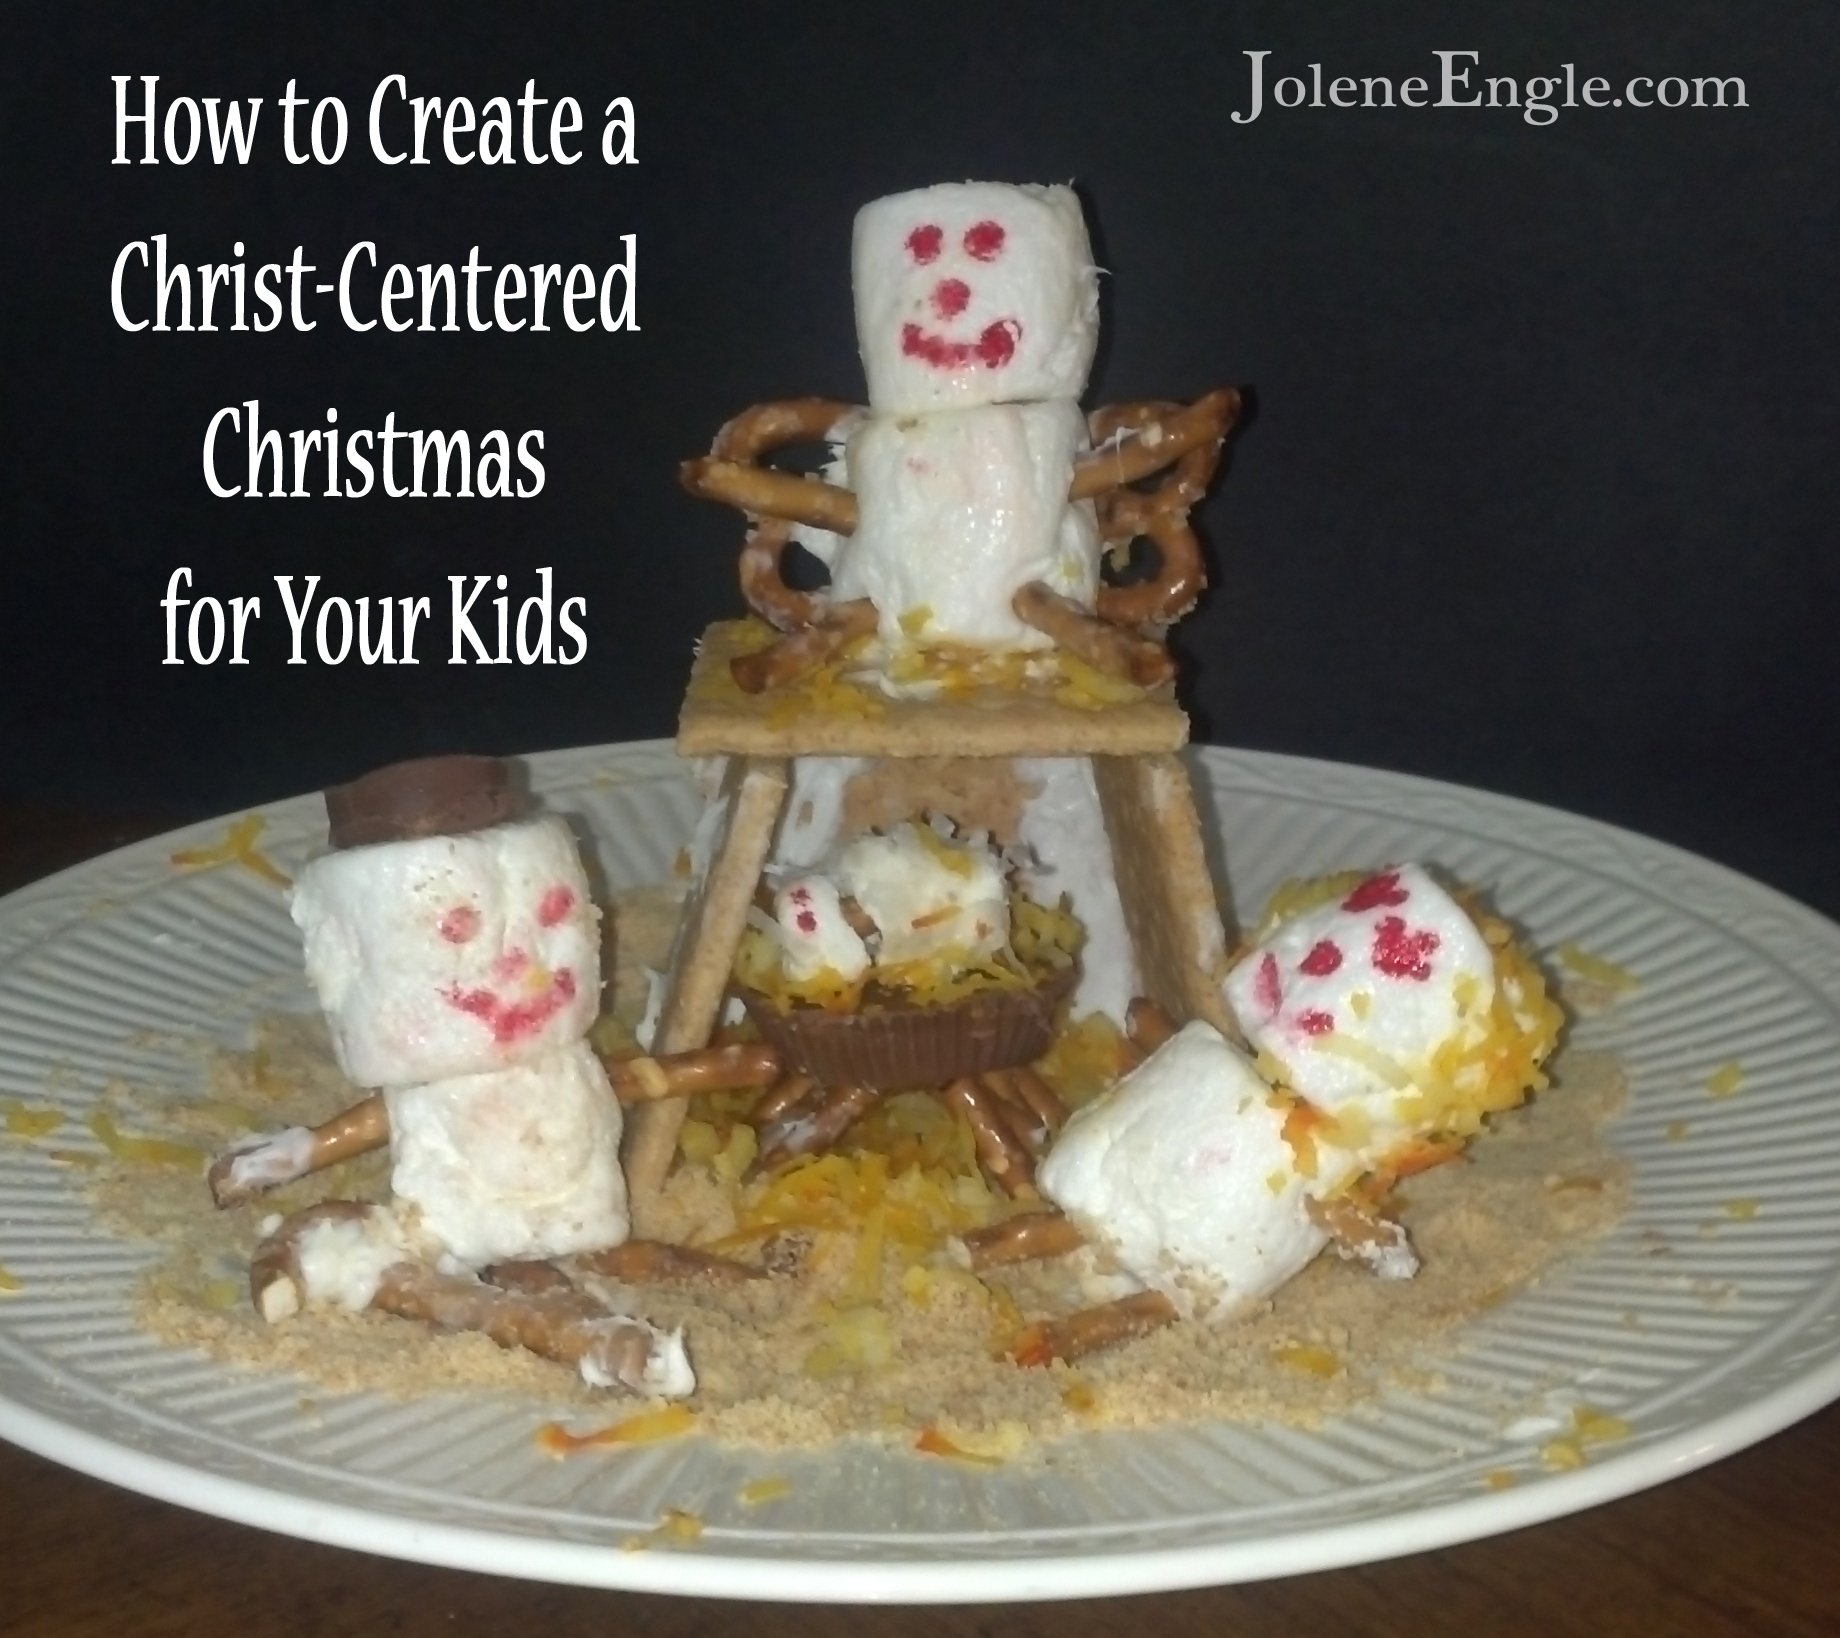
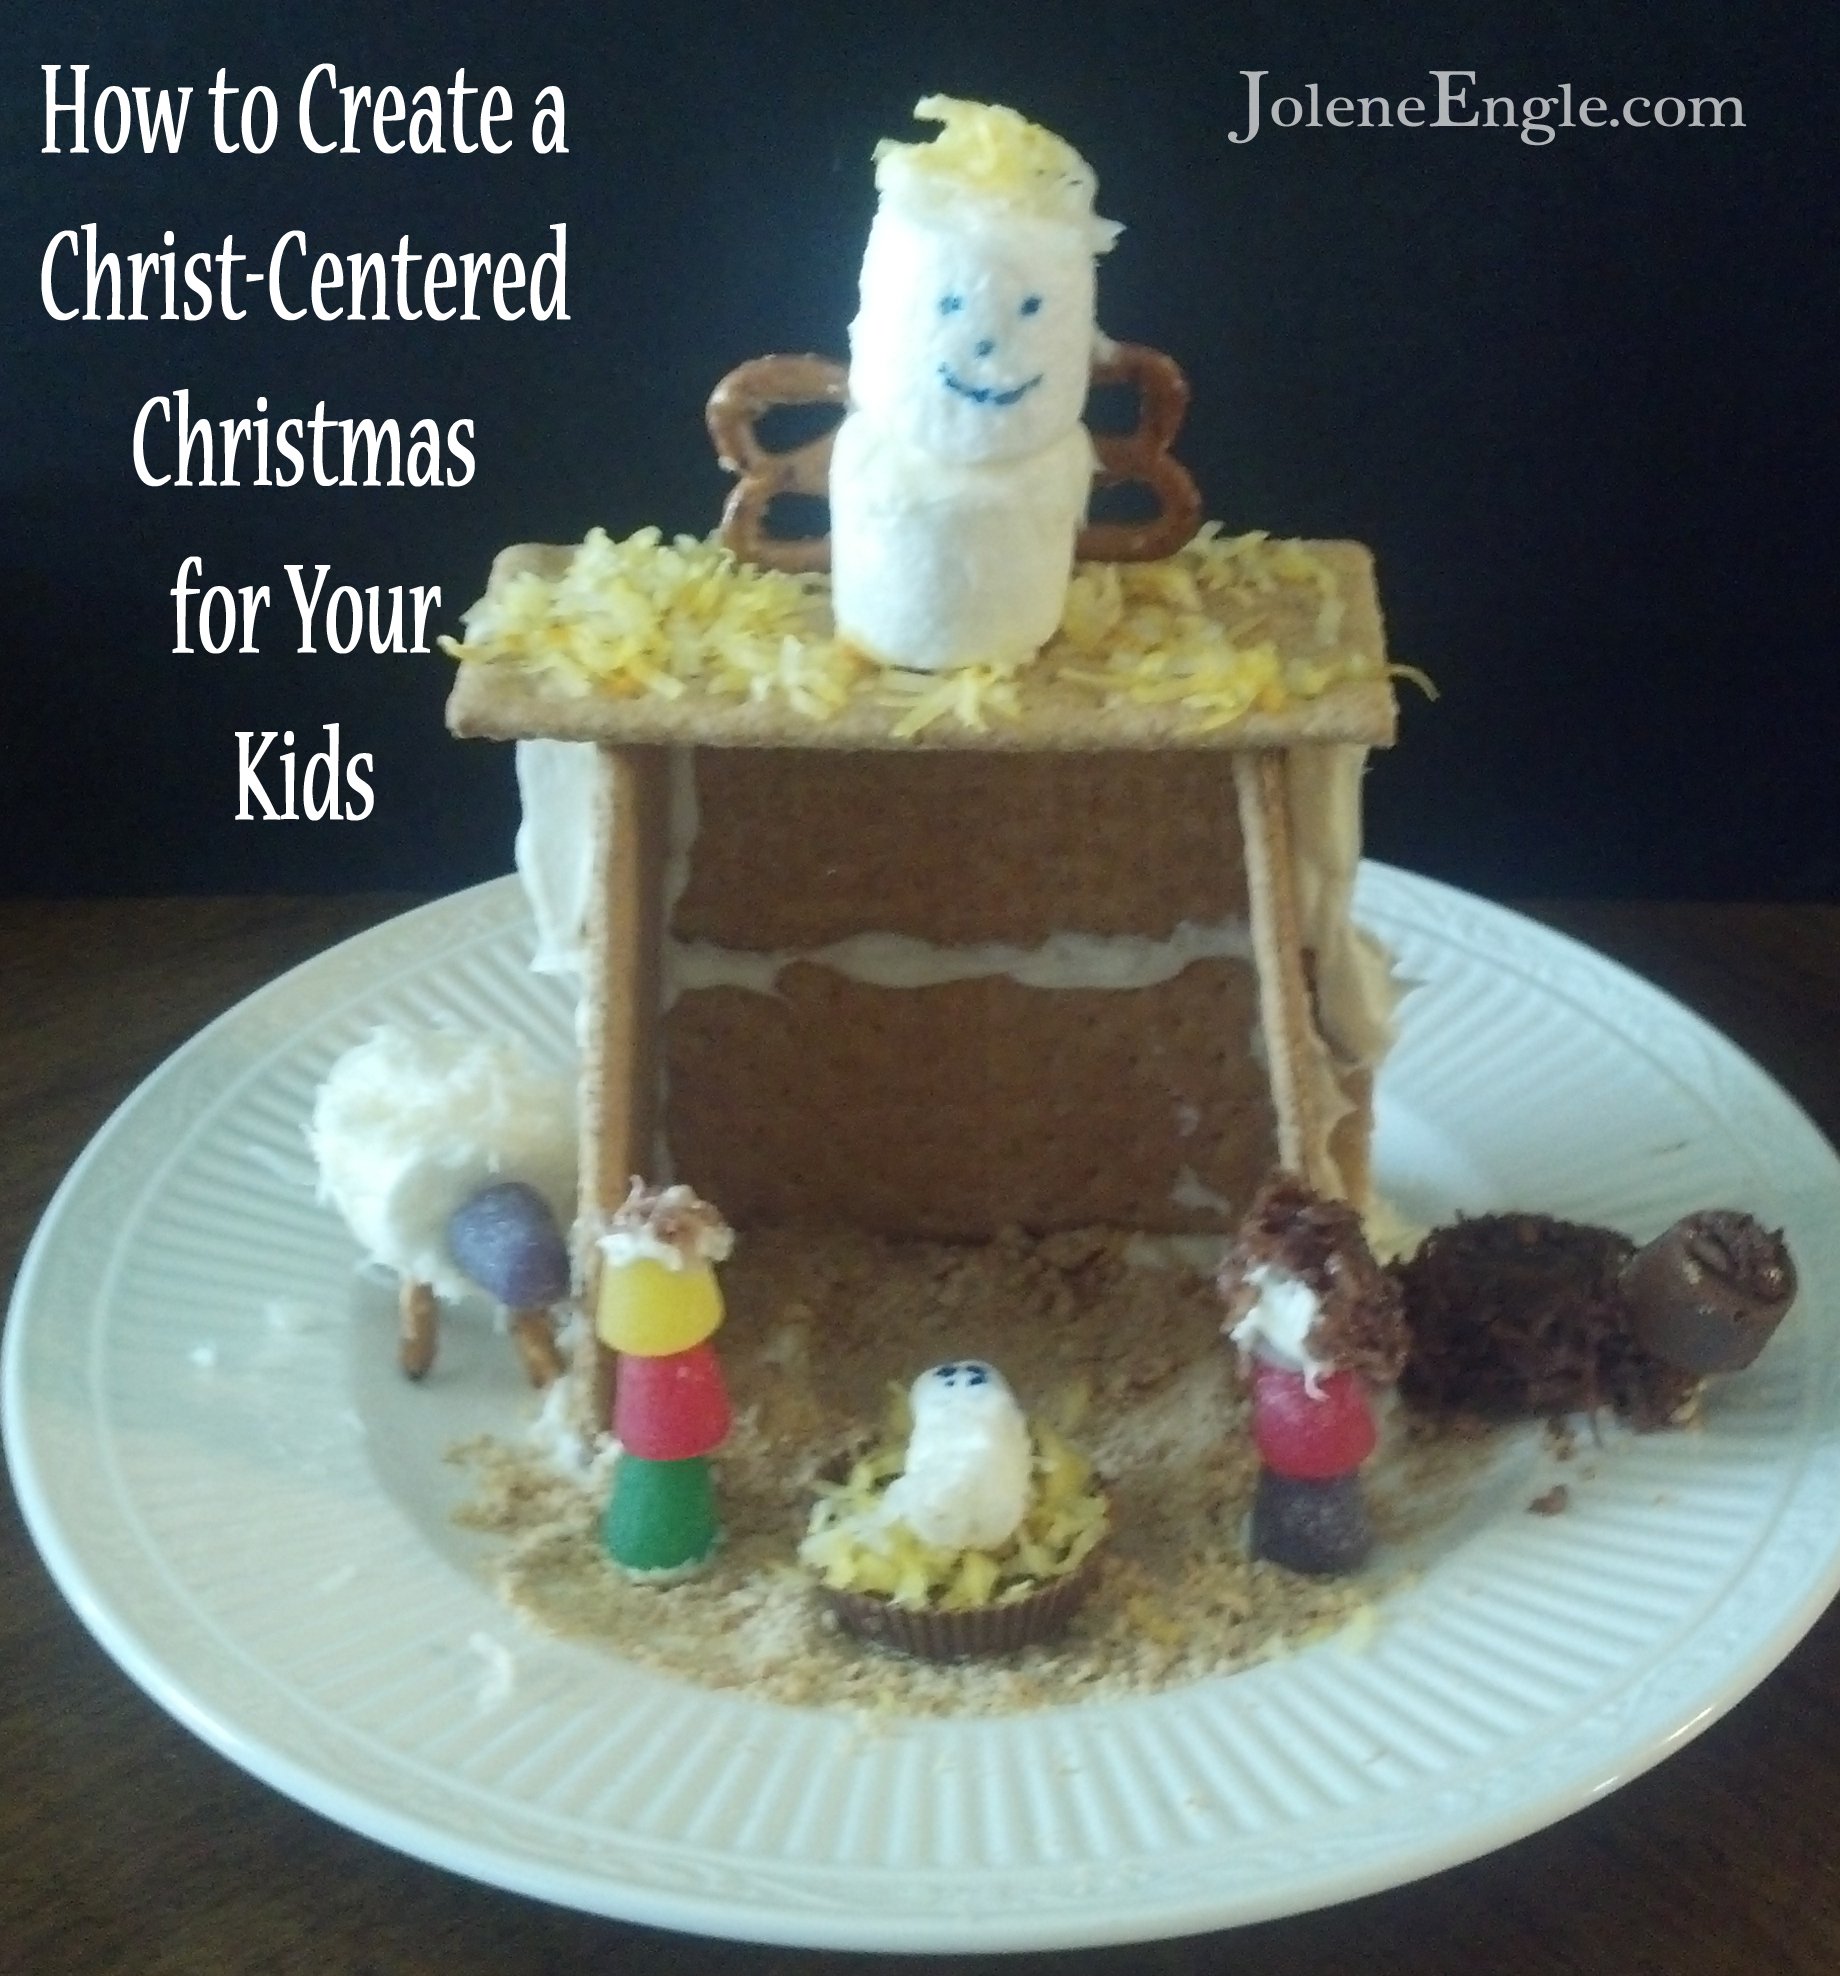
One of my favorite activities I’ve done with my kids over all of these years is the Edible Nativity. Again, I redeemed my time on this one. I took the concept from building a typical gingerbread house with my kiddos to having them build a nativity.
Just to give you a sneak peak into the book, here are the instructions to this yummy activity!
Edible Nativity
Basic Ingredients:
- Graham crackers (I have found the Honey Maid brand to be the most sturdiest. The off-brands tend to break more easily.)
- White frosting (I’ve always used store bought, however, I’ve heard that homemade Royal icing makes a great glue.)
- Coconut mixed with yellow food coloring
- Large marshmallows
- Mini marshmallows
- Pretzel sticks
- Food coloring markers to make faces for the people
- Reese’s peanut butter cup or some other edible goody for the manger
When my kids were really young (toddlers) I kept things extremely simple in this project because that’s all this mama could handle! I used large marshmallows for Mary and Joseph and the smaller ones for baby Jesus. During those early years, we did not have dirt added to the ground, although the dirt is really easy to do and the toddlers would love it! Nor did we have angels, sheep and donkeys added to the mix.
As my kids have gotten older, we’ve become much more creative and tried different types of goodies to embellish our edible nativity.
Depending on the age and ability of your children, feel free to experiment with some of their (or mom’s) favorite types of candy!
Gluten-free Alternative
If you’ve gotten gluten-free eaters in your home…no worries! We’ve had that obstacle as well, so we made our stables out of freshly made rice crispy treats. Just fashion the walls and roof of the stable with this gluten-free alternative following the instructions below. Also, make sure all other ingredients are gluten-free.
To assemble the stable:
(If making the smaller stable, just use half of a graham cracker for each side, the back, and the roof of the stable. See picture for example.)
Step 1
Place a glob of frosting on the plate where you’ll stand each end of the side wall graham crackers. This will hold the stable in place so don’t neglect this step!
Step 2
Use one full graham cracker for each side of the stable.
Step 3
Add frosting to their sides so you can attach the back of the stable wall to them.
Step 4
Take one graham cracker and lay it against the side walls. Add frosting to it’s sides as well as to the top of the cracker. Stack another graham cracker on top. Make sure you use plenty of frosting because this is the glue that holds all the crackers in place.
Step 5
Your last piece of the stable is the roof. Use one full piece of graham cracker for the large stable or half of one for the smaller version. Just set it on top and now you’ve got yourself a stable!
Mary and Joseph:
Use two large marshmallows and a pretzel stick to make their body and head. Use food coloring pens to make their face. Or you can use 3 gum drops on top of each other. Use a toothpick to hold them in place. To add hair, use coconut mixed with chocolate syrup. Place a dab of frosting on the gum drop and then add the hair so it’ll remain in place.
Baby Jesus:
Use two small marshmallows and poke them with a pretzel to hold in place. Use the food-coloring pens to make his face. If you’d like to wrap him in a blanket, you can cover him in frosting and place coconut around him.
Straw:
Place coconut in a baggie for each child. Then squirt a few drops of yellow food-coloring into the bag. Zip it up and have the child shake up the bag. (They love this!) Have them keep mixing and let them know they’re making straw for Baby Jesus to lie in.
Manger:
Use a small chocolate square, a Reese’s peanut butter cup, a chocolate swoop, etc. Anything edible that you can find that would hold baby Jesus.
Dirt:
Take 2 broken graham crackers and place in baggie. Zip it up real good and have your child smash up the crackers until it resembles dirt. Place the dirt on the plate before you add the people/animals.
Sheep:
Take a large marshmallow and roll it in frosting and then uncolored coconut. Add some legs (pretzels) and a head (either a small marshmallow or gum drop) and you’ve got yourself a sheep.
Donkey:
Break one Kit Kat stick in half and place it on top of the other. Mix coconut with chocolate syrup to create the donkey’s fur, and then cover the Kit Kat with this. With a toothpick, attach a Rolo to the top of the Kit Kat to make the donkey’s face. When you’re done, you’ve got a laying down donkey that carried Mary into Bethlehem!
Angel:
Take two large marshmallows and poke through a pretzel to hold them together. To add wings, use pretzels dipped in frosting to attach them on the back of the marshmallow. For a halo, put a dab of frosting on the top and sprinkle it with yellow coconut. Add pretzel sticks for the arms and legs.
Don’t forget to take a picture before the kiddos eat up their masterpiece!
Live a poured out life for Christ,
Need some encouragement and guidance in your marriage? Grab my latest book, Wives of the Bible: 25 Easy Lessons You Can Learn from these Imperfect Women that Will Radically Transform Your Marriage.
Similar Posts

Hi, I'm Jolene.
I'm so happy you're here!
Latest Posts
My Podcast


